Whether you’re brand new to camping or not, you need to know how to make fire for camping. This skill isn’t always for survival and warmth; if you’ve ever sat around a campfire with friends you know the relaxation you feel.
Knowing how to make one is essential for a good camping experience. But you don’t have to use it only when camping. With my three young boys, we get out camping a handful of times each season, but we have fires in the backyard all spring, summer, and fall.
Read on for a step by step guide on how to make a campfire.
Heads up! This guide is specific to starting a fire, but we can’t cover every single method for sparking a flame. As such, we’ll offer some different options with brief instructions when we get to that part.
WHAT YOU’LL NEED
The specific things you’ll need to make a fire are different depending on what’s available, but they fit into certain categories. I’ll list what I prefer to use, but I’ll offer some common alternatives you can use as well.
Tinder – Tinder is small, easily burnable material. Often it’s made of dry grass, leaves, pine needles, or stripped bark. The purpose of tinder is to take off with quick, hot flames that heat up the larger kindling.
My secret hack for tinder is to use dryer lint. Instead of throwing it all away, collect it in a plastic bag and bring it on your next trip. It burns hot, easily, and for quite a while, actually.
If you wanted to buy something that works well, the link above takes you to a manufactured tinder starter that works really well in dry or wet weather. Or you can always use a fire starter log (read more about how to use one here).
Kindling – When you look for kindling, you’re looking for thinner pieces of wood of various sizes. I prefer to use dried sticks and branches ranging from about the thickness of your thumb to twice that size.
Kindling is the middle man for transferring heat. When the tinder starts the kindling on fire, they burn longer and hotter. You can easily find this around your campsite, just make sure it’s dry.
If you want to buy something, you can check out the prepackaged and dried kindling at the link above. Honestly, I would save the money and find some naturally, but if you wanted a backup in case it rained go for it.
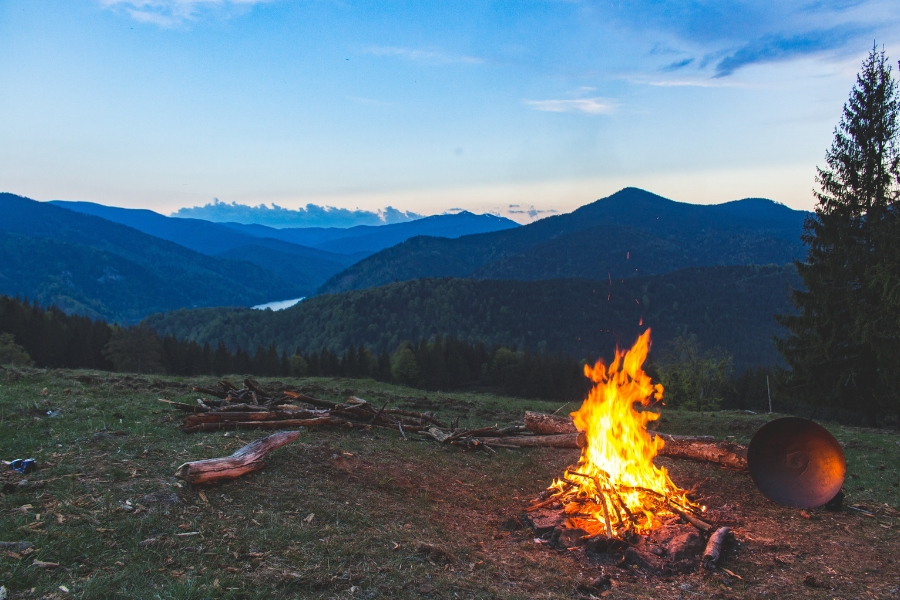
Fuel – When making a fire, fuel refers to logs and other large pieces of wood. This is the material that burns longest and creates the good coals that build a long-term, sustainable campfire.
I’m not including a link to these because you should be able to find this around where you are. Again, make sure that the wood is dry. If it’s not, you can still build a good fire, but you’ll need to get the kindling hot and heat the moisture out of the fuel.
Fire Starter – Finally, you need something that provides the initial heat and spark to get the tinder going. Most people go for matches or a lighter which work great. I use though too, but I do like having the linked knife that comes with a firestarter in case of emergencies.
If you’re feeling like being a real outdoor expert, there are other ways to start a fire more “naturally.” We won’t go into these in this article, but you can check out more here.
STEP BY STEP INSTRUCTIONS
With your materials gathered, follow these instructions and watch the video below to figure out how to make fire for camping.
1) PREPARE THE CAMPSITE
It’s time to get your campsite ready for a fire. Clear an area for the campfire, and make sure it’s free of debris.
Gather some rocks to make a circle around where you plan to put the fire. If you’d like, you can dig out some of the dirt where your fire goes. This is helpful if the ground is wet because it gets to the dry dirt.
Take some kindling and lay three-four pieces next to each other. Then place the tinder on top of that. The space under the kindling lets air fuel the tinder once it’s lit and keeps it off wet ground.
Pro-tip: Keep your wood close by. Don’t try to light a fire without being able to focus on it and give it the attention it needs.
2) LIGHT THE TINDER
Now it’s time to light the tinder. Using your matches, lighter, or firestarter ignite the tinder. I like to start it in at least two different spots.
Make sure at this point to protect the flame from the wind and/or rain. If you dug your pit down a bit, that should help. If not, place your body over the fire and between the wind and the wood.
3) ADD THE KINDLING
As soon as the tinder starts to flame, place several of the smaller pieces of dry kindling on the tinder in either a cabin or tipi fashion. Folks argue to the death about which style works best.
In my experience, a small tipi close to the flames is the best way to get the kindling going. In the video, the expert recommends a tipi to get the kindling started and then switch to the cabin style.
As the small kindling gets started, you need to add some larger kindling too. This is the trickiest stage and the one that bears the most watching.
Pro-tip: If the kindling doesn’t seem to be lighting, you may need to gradually add more tinder until it’s hot enough to start.
Warning! Be careful you don’t smother the fragile flames of the tinder with too much material. Make sure air can get to the fire or else it won’t stay lit.
4) LIGHT THE FUEL
Once you have a good amount of kindling started, you need to add the fuel logs. Start with the smallest and the driest of the fuel. Put a couple of them over the flames as direct and close as you can while still letting air get to fire.
If you chose cabin style, it’s easy to place the fuel on the kindling across the “walls” of the cabin. If you chose to stick with tipi exclusively, use 2-3 short fuel logs to lean against each other directly over the flame.
It may take a longer time to get the fuel lit especially if they’re large or wet. Keep adding kindling until it does. You need that kindling to keep the flames hot enough to start the fuel. Once that’s lit, everything gets easier.
5) KEEP IT GOING
Once the first few fuel logs get lit, your next goal is just to keep the fire going. Add more kindling as needed to keep the fire hot. When the fuel is going nicely, you can add another couple pieces to keep it all going.
For this last step, you’ll know you’re set when you have a nice bed of smoldering coals. This is the end stage of your campfire. Keep adding logs as long as you want to have a fire, but once you get a bed of coals, it’s simple to light more logs.
Pro-tip: If you plan on cooking over the fire, you usually don’t want a lot of flames. Wait until you have a deep bed of coals with small flames for more even cooking without burning your food.
Congrats! You made fire!
COMMONLY ASKED QUESTIONS
Is campfire smoke dangerous? – In general, the answer is “Not at all.” I can’t say that campfire smoke isn’t damaging in all situations. Don’t intentionally inhale the smoke though.
If you’re burning all-natural materials and not directly breathing in the smoke for long periods of time, it’s fine. If you’re adding chemical and plastics to the fire, then you may want to avoid breathing in the smoke until those things are totally burned off.
When burned, these man-made things can release chemicals that damage your lungs. I would recommend not burning them in any situation, but if you must, keep a safe distance until the fumes have dispersed.
Why even build a campfire? – It’s a sign of our current day and age that I’ve had people ask me this. The usual argument is that: if you have a portable heater and cooking device, why go through the effort of starting a campfire?
There are many practical and social reasons for making a fire for camping. I’ll list some of the most common below:
- Keeps you warm
- More traditional camping experience
- Cooks food, heats water, dry clothes
- Keep away animals
- Dancing flames are actually proven to relax the mind
- Smoke keeps bugs away
- Creates a focal place for your camp to sit with others
Can I use gas to help start a campfire? – You can. I wouldn’t. The chemicals released are really dangerous, and if you use too much, you can actually create a small explosion that endangers you, those around you, and the environment you’re camping in.
CONCLUSION
We hope you enjoyed learning how to make fire for camping. The two most important things to remember are to:
- Get as dry material as you can
- Go up in size as the fire builds (tinder → kindling →fuel)
You can go out there and start a fire without worries. Your family and friends will appreciate your outdoor expertise.
Now get out there and enjoy the fresh air!
If you enjoyed this article, you may also enjoy What is car camping?